By Andrew Ahearne Sep 02 2022
An Expert’s Guide On How to Install Roller Blinds
Roller blinds are a popular window covering choice because they offer a combination of versatility and style. They can be customized to fit any window size, and are available in a variety of colors and fabric textures to match any decor.
Roller blinds are also easy to operate, making them a great choice for homes with children or pets. And when it’s time to clean them, roller blinds can be easily washed by simply unrolling them and hosing them down.
Installing roller blinds is a great way to improve the look and function of your windows. It is a fairly easy process that can be completed in just a few steps, but if you prefer professionals to install your blinds, you can easily book a blinds installation service with us. We service across Canberra, Hobart, Adelaide, Gold Coast, and many other cities. We also have blind cleaning professionals who can give your old blinds a renewed look.
In this article, we will walk you through the installation process so that you can get started on your DIY project right away. We will also provide some tips for ensuring a successful installation. So, whether you are a beginner or an experienced DIYer, this guide has everything you need to get the job done right. Let’s get started!
What You’ll Need to Get Started?
You will need the following items to learn how to install roller blinds. The things necessary to secure the installation are a step ladder, a drill, a tape measure, screws, a flat head screwdriver, a pencil, masking tape, a chain bracket, aluminium tube, and other hand tools that may be relevant in the installation.
You will also want gyprock plugs and spring toggles if you are working with plasterboard or Drywall anchors. To complete a difficult installation, you might need a wide variety of tools and components, such as shears, a knife, a hacksaw with fine teeth for cutting metal, a crack filler, and some rubbers. There are more, but these are the bulk of the things that could be necessary for you.
You could assume that going down the DIY road would be the most cost-effective way to install roller blinds; nevertheless, it would always be preferable to trust the specialists. Nonetheless, putting up your blinds is pleasurable and uncomplicated. Tap yourself for a job well done by following these six simple steps. Here’s how it’s done:
Finding the Mount’s Dimensions and Height
You should measure your window to ensure that you get the right size of the roller blind. Most roller blinds are sold as a set containing all the parts you’ll need to install, including the brackets, blinds, and tensioning mechanism. Using a tape measure, find out how big the frame is. You may hang your blinds inside or outside the window frame. To make your window appear larger, you should put your blinds outside.
Blinds that are hung on the inside of a window make it appear smaller. If you use an exterior mount, you’ll need to take measurements around the window frame. To get the precise length of the casing, measure from top to bottom when your knowledge about how to install roller blinds starts.
Purchase The Right Roller Blinds
It will help if you get blinds sized according to your dimensions. There is a wide selection of blinds from which to pick, and the one you select will need to be determined entirely by your individual preferences. If it does not fit perfectly, you should get a bigger blind and ensure it is on the correct side. You may always trim the blinds to suit the requirements of the room.
Most roller blinds are long-lasting, come in many colors, and can cover large windows. Custom roller blinds look and operate better and might save you money on your energy costs. The spaces between blinds and window frames let little light and heat in. So, fewer gaps help keep house temperatures consistent.
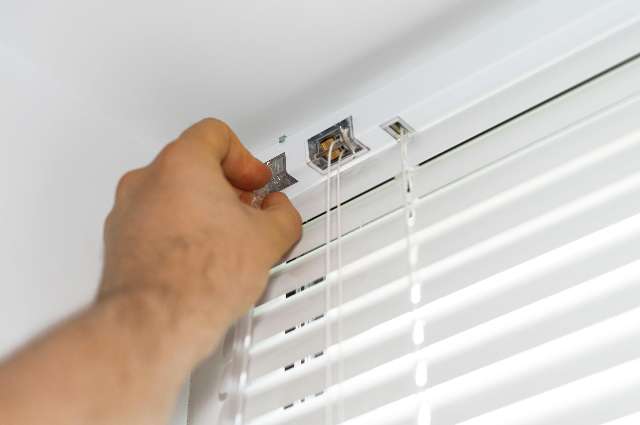
Get Your Brackets Mark and Attach
Grab a pencil and two brackets. Using a level, lift each bracket into place and mark two points where the screws will go into the frame. Make sure the chain drive bracket is positioned where your chain will rest.
There must be no space between the two brackets and the two holes you have already marked and drilled. You can use your cordless drill with the Phillips head drill bit to fasten your bracket to the wall with the screws included in your bespoke kit.
Install the End Bracket
Put them inside the pencil markings you’ve already made with the measuring tape. The bracket has two open sides; the one position facing you should face outward, and the one facing toward the middle of the window should do the reverse. The door of the bracket must face the room’s interior. You must remember these details to go on to the next phase.
Make Holes for Screws
You should use a 1/16-inch drill bit to mark two holes slightly smaller than the head of the screw to secure your bracket on the correct corner if you’re drilling into the timber. Replace the bracket, then screw the replacements into place using the drill.
Make it Suitable for Children
Follow these precautions to keep your children safe from choking hazards:
- Use the safety tension mechanism included in your roller blind installation package to secure the chain.
- As soon as the p clip is in place, hold it and indicate the spot where you intend to screw it into your frame or wall.
- Remember that the chain should be loose and dangling freely.
Using a cordless drill and a Phillips head drill bit, screw the p clip into your frame or wall. To ensure proper installation, make sure that you use wooden framing or studs in the wall.
Put the Valance Clips in Place
Put the valance clips where they belong with minimal tension. Clips for the valance are used to secure the head rail to the valance. Before inserting the head rail into the bracket, the valence clips should be positioned so they snap over the front lip of the head rail.
Your roller blinds may be constructed from a series of ‘ladders.’ If this is the case, position each valance clip near rather than directly on top of each ladder. It’s possible to get the valence clips trapped in the blinds’ cords if they are placed right over the ladders.
Make Sure the Head Rail is Inserted into the Bracket
After drilling the brackets into their new positions, ensure that the brackets doors are completely open, and then fit the headrail with minimal tension into them. Now that you are satisfied with the position of the headrail, shut the bracket doors by squeezing their handles together. There ought to be a snapping sound that you can hear.
Attach the Valance
You will want to arrange the valance to hang the head rail in your chosen location. Place it on the valance clips and hold it there. When you have it arranged the way you want it, please give it a little tap on the surface so that the valance clips can snap into the valance and secure it.
Placing the Roller Blinds
Adjust the blinds for the perfect fit with your hands clean. If the blind you have is too large, you can trim it down to size. Place your roller blind into the idle bracket so the spring pin clips into the guiding hole. Adjust the length of the blind roller that will fit to protect you from too much exposure.
Mark a line with the pencil and your preferred fabric styles for the blind, preferably if you measure it. You should slice the fabric vertically. Take care of the roller for the fabric.
It is important to check the measurements twice before cutting the blind. When rerolling the fabric, check to see that it is perfectly horizontal. Placing the Bracket Covers in Position is also important. Outer bracket covers should be attached to the two brackets. Because the roller blind fabric is packaged in a horizontal orientation, some horizontal lines may appear on the fabric.
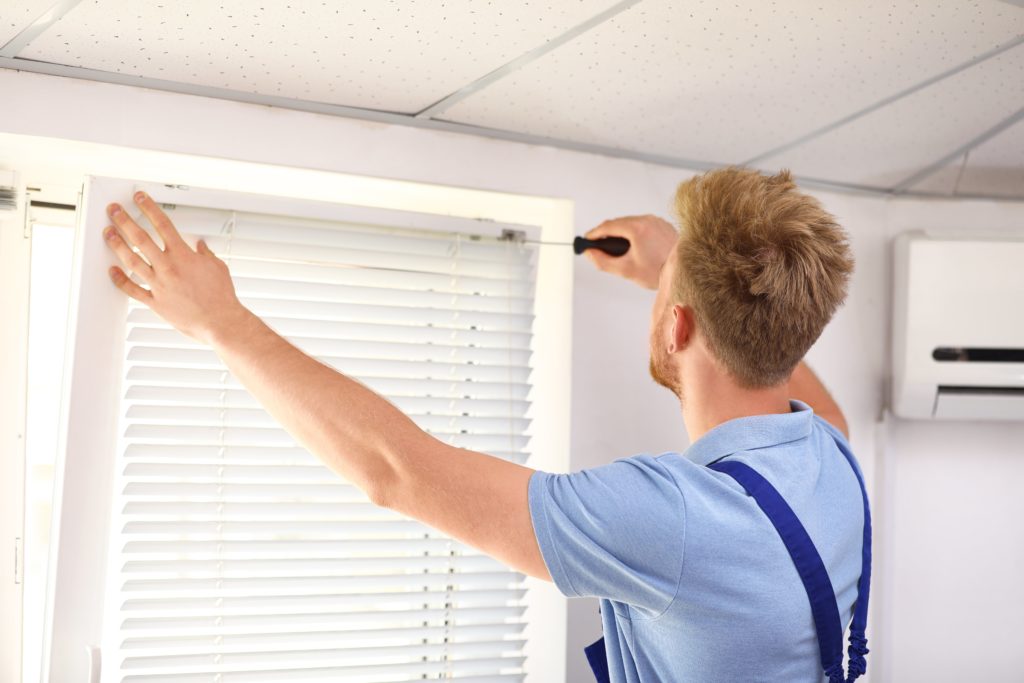
Use the brackets to hang the blind.
To install the roller blinds, jam them into the brackets you’ve already fastened and measure. To guarantee that the roller blind is installed correctly, you need to make sure that the chain end is secure and that you are following the directions provided with it.
It’s Time to Attach that Chain Up!
Attach screws that secure the chain to the wall. For the greatest results, you should use a hand drill. Next to the blind, there are a few chains that are dangling freely. If this is the case, there is no need to stress over securing the chain. You will need to thread the chain through the safety bracket, and then you will need to tighten the safety bracket into the window frame.
Types of Installations You may Encounter
You could experience a variety of installations, and the following are some potential scenarios that might be helpful to you as you are working through the process.
Putting Blinds into a Wooden Frame
The blinds are often fitted inside the frame, which is the simplest and most popular kind of installation. Place the brackets 1cm away from the room side of the frame and align them along the top of it 1cm wide from the window.
You can predrill these and screw brackets in the corners holes if you want to decrease the possibility of the wood breaking. Screw the two screws into the brackets one at a time. On the architraves or externally mounted are two more frequent options. To see where the screws should go, refer to the photographs below. Cover plates may be required for external brackets.
Plasterboard, Drywall, or Gyprock Blind Installation
Once you’ve designated your holes, drill a long screw around 50mm into the specified location to see whether it works. This screw will hold the blind in place on the gyprock if it contacts a wood stud, aluminium, or another sturdy material. Unscrew and remove the long screw if it doesn’t make contact with anything. Using your standard drill driver bit, enlarge the hole to the size of your driver bit by drilling into the hole.
Aluminium Installation
Drill into the aluminium with Tek head after marking the location of your bracket’s installation. Most of the time, this should work without a problem. You may need to predrill the screw hole in thicker metal. If metal is too thick, has anything underneath it, or is not aluminium, you should look at other options.
Air Conditioning ( 3 )
Blinds installation ( 3 )
Building and Pest Inspections ( 4 )
Car Detailing & Car Wash ( 3 )
Carpet Cleaning ( 3 )
Carpet Installation ( 2 )
Custom Fish Tanks ( 2 )
Dry cleaning and ironing ( 3 )
Fencing Contractors ( 5 )
House Cleaning ( 7 )
House Painting ( 6 )
Ironing Service ( 1 )
Lawn Mowing ( 3 )
Pest control ( 2 )
Pool cleaning/servicing ( 3 )
Pressure Washing ( 2 )
Uncategorized ( 6 )
Professional Home Services at your Door
Get it all done with Sidepost - House cleaning, fencing, painting, and more.